
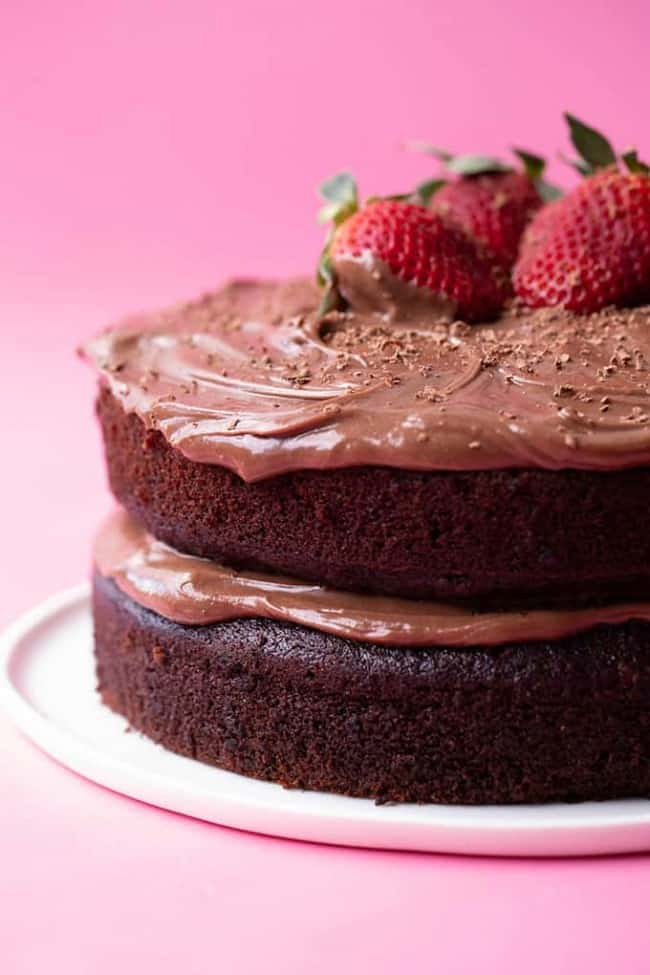
A delicious no bake Chocolate Mousse Cake made using just 5 ingredients. This easy chocolate cake has a crunchy Oreo crust and is topped with whipped cream and fresh raspberries.
I made you a cake 💕
This Chocolate Mousse Cake is made using just 5 ingredients, but it looks spectacular. And it tastes even better than it looks.
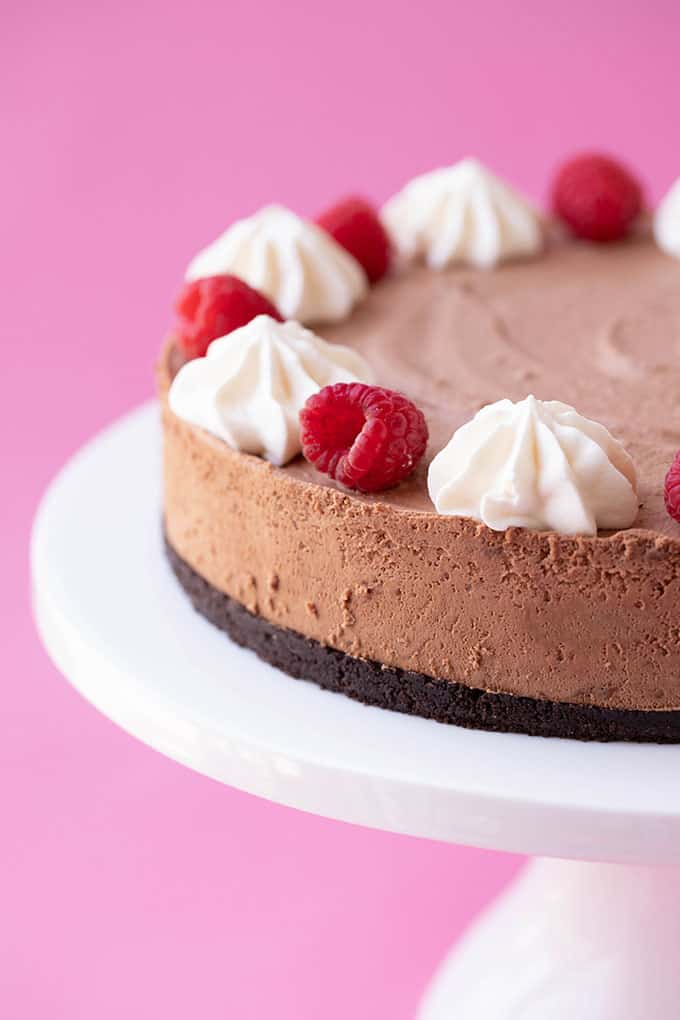
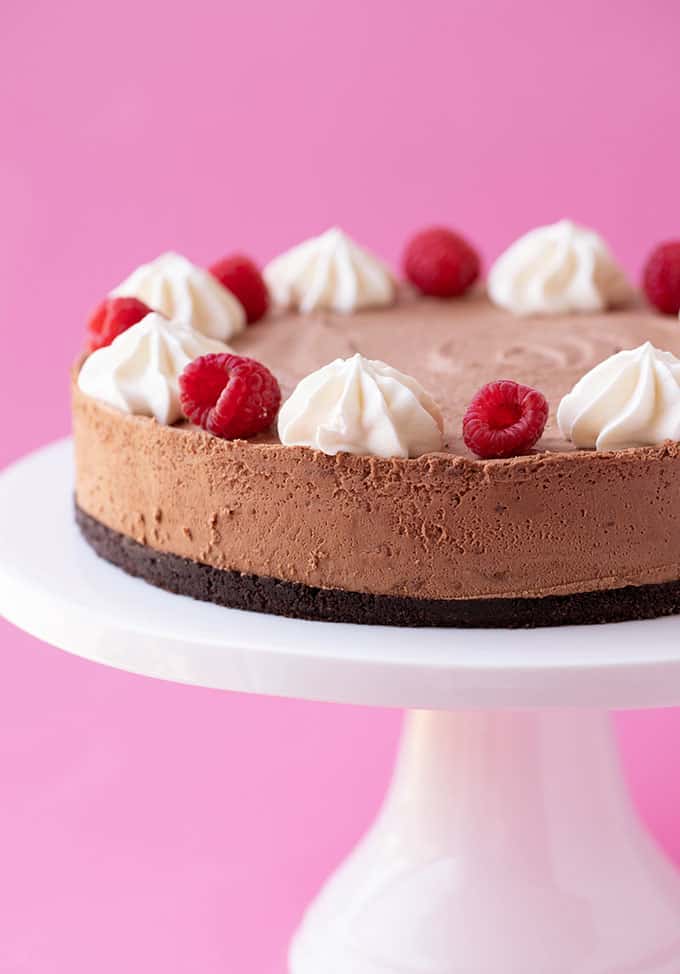
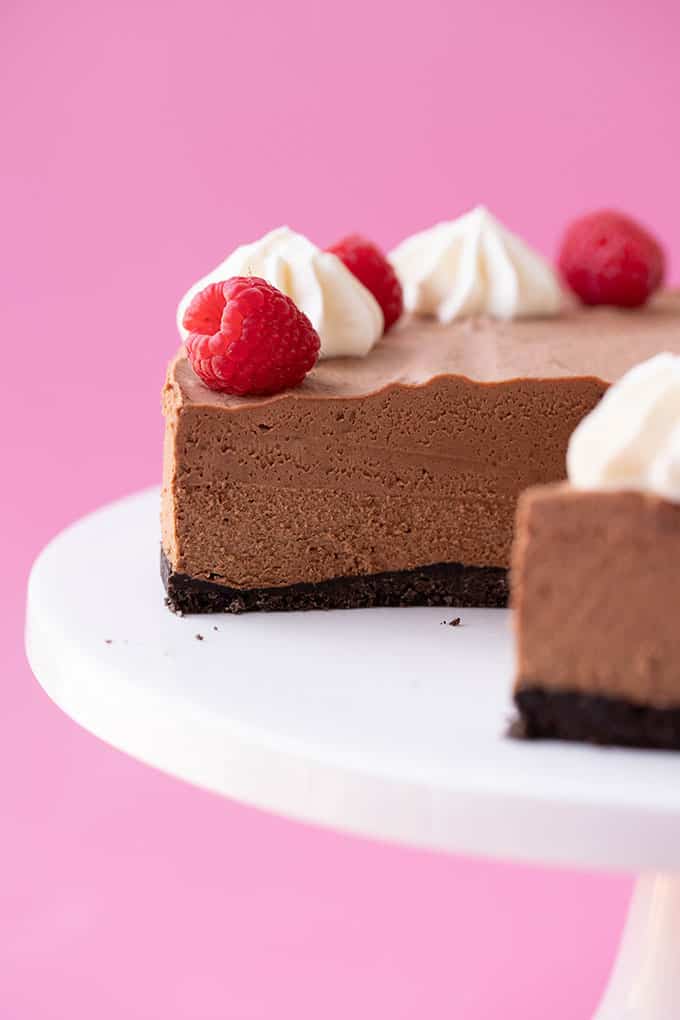
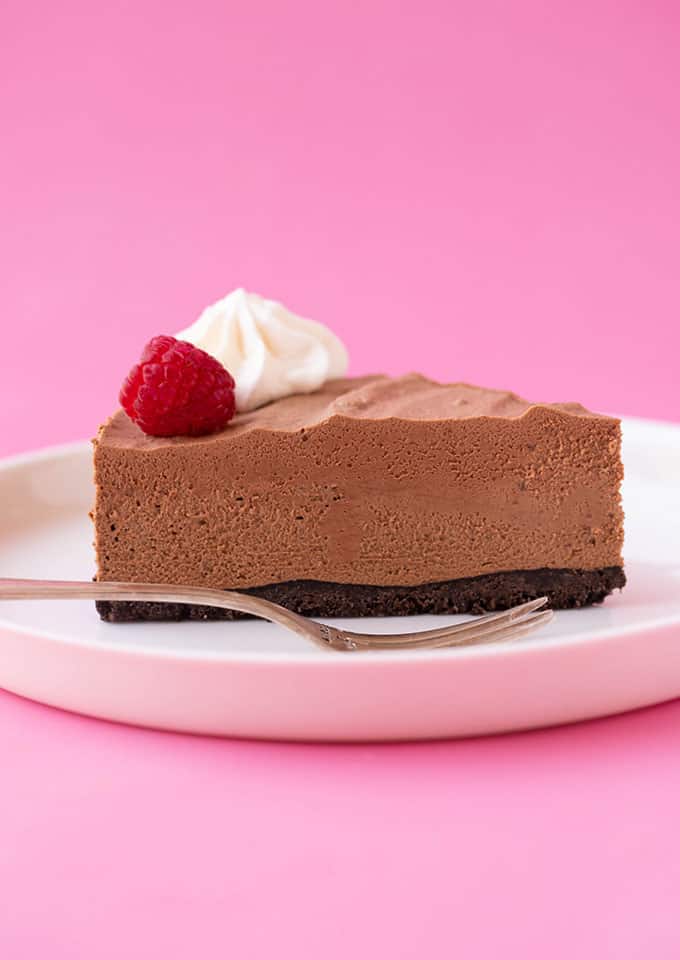
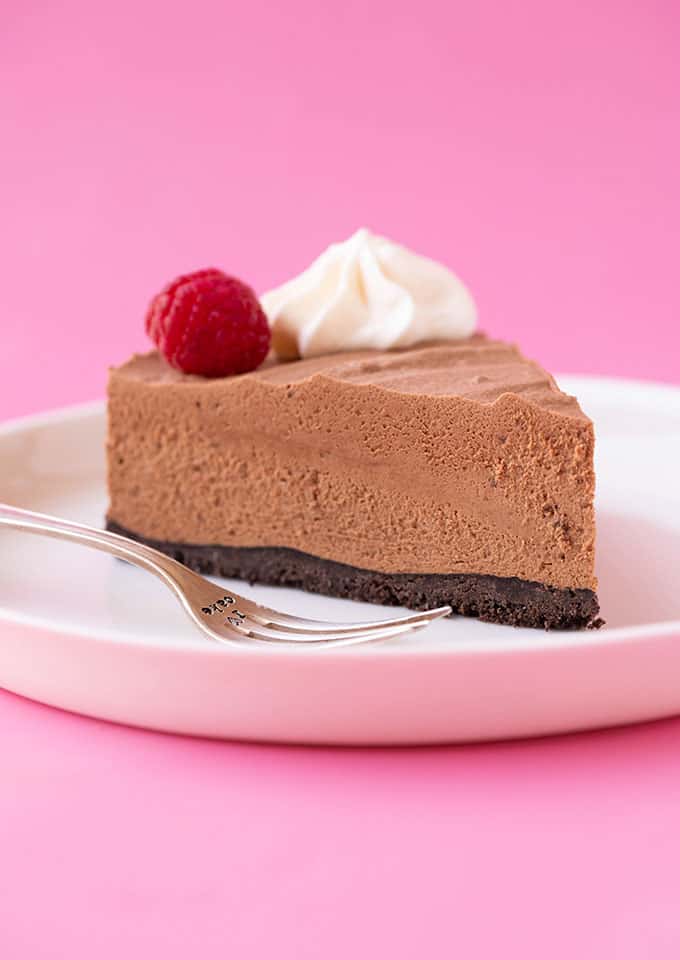
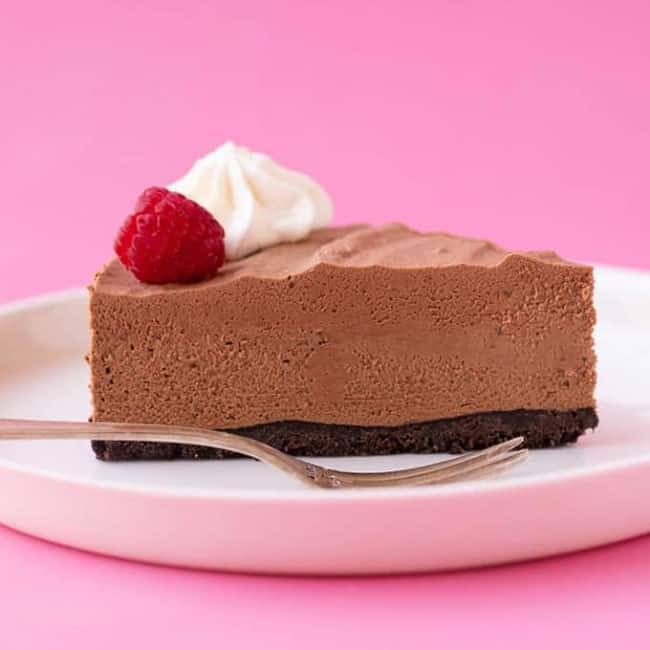
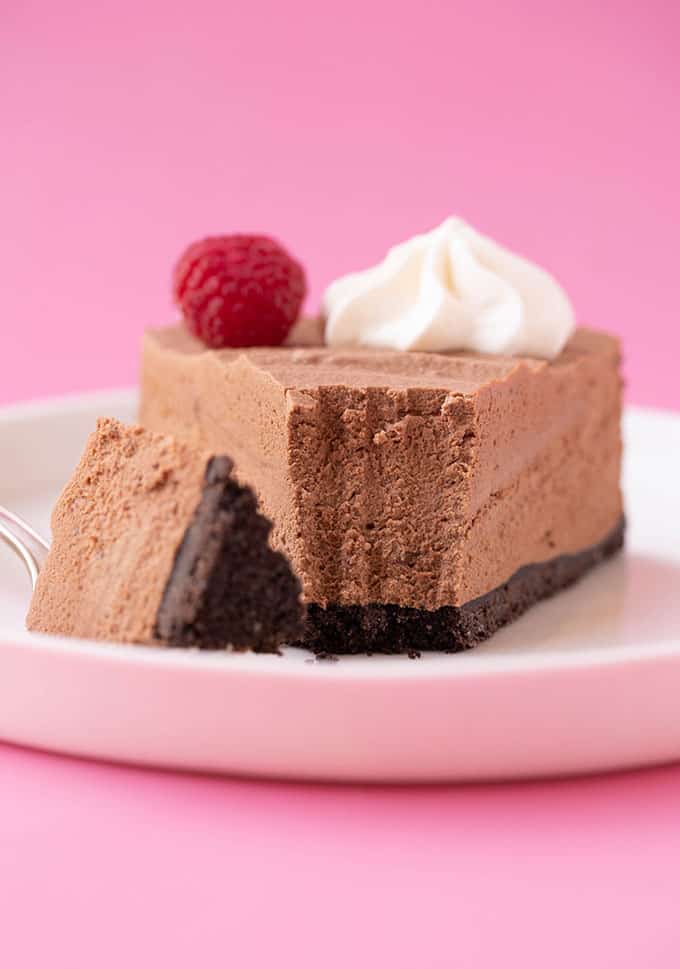
A crunchy Oreo crust topped with silky, smooth chocolate mousse and clouds of freshly whipped cream. It’s the perfect no bake chocolate cake.
If you’re looking for something to satisfy your chocolate fix but don’t want to turn the oven on, this 👆🏻 Chocolate Mousse Cake is your answer. Not only is it super easy to make but it tastes amazing.
The cookie base is made using whole Oreos, so it’s buttery and sweet and just a little bit crunchy. But the star of the show is most definitely that chocolate filling. It’s made using just three ingredients – and two of them are chocolate.
Make no mistake, this Chocolate Mousse Cake is not for the faint-hearted. It’s oh-so-chocolately. Serve a slice with whipped cream and fresh raspberries for the ultimate no bake dessert.
This is my go-to recipe when I’m entertaining because you can make it ahead of time. Since you need to give it time to set in the fridge, it’s best to make it the night before.
It keeps really well in the fridge and you can just whip it out at a dinner party and it looks like you’ve spent hours making it. But the truth is, it takes less than 30 minutes to throw together.
You will love this cake because:
- You only need a handful of ingredients
- It’s quick and easy to make
- It looks super impressive – your guests will love it!
- The chocolate mousse just melts-in-your-mouth
- You can make it ahead of time
save this recipe
TIPS FOR MAKING CHOCOLATE MOUSSE CAKE
- Start your cake by crushing your Oreo cookies. You can leave the cream filling in, it adds extra flavour – and who wants to sit there dividing the Oreo cookies and the cream filling? Not me!
- If you don’t have a food processor, you can put your Oreo cookies in a plastic zip lock bag and bash them with a rolling pin. It takes a little extra time and elbow grease, but the result is ultimately the same.
- The chocolate mousse is made using chocolate and cream. I recommend a mix of half milk (sweet) chocolate and half dark (semi-sweet) chocolate. This gives you the perfect blend of chocolate flavour and sweetness – without having to add any extra sugar.
- The final important step is making sure you whip your cream properly. The cream is what is going to give the cake it’s luscious, full-bodied texture and it’s also going to help the cake set. To check your cream is whipped to stiff peaks, try the bowl trick – you should be able to tip your bowl upside down without any cream moving. That’s how you know you’re good to go!
MORE NO BAKE RECIPES
- No Bake Raspberry Chocolate Cheesecake
- Nutella Oreo Cheesecake
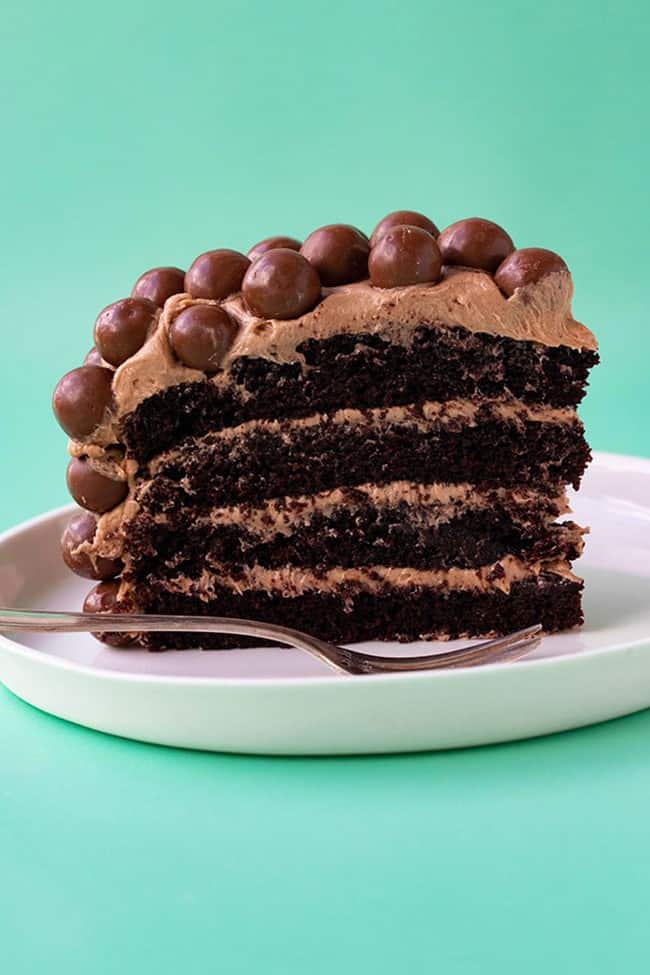
- Chocolate Malt Mousse Pie
- No Bake Key Lime Pie
- No Bake Peanut Butter Pie
Did you make this recipe? Don’t forget to rate the recipe and leave a comment below. Hungry for more? Join me on Instagram, Facebook, Pinterest and Twitter for more amazing recipe ideas.
Let’s Bake
Chocolate Mousse Cake
A delicious no bake Chocolate Mousse Cake.
Ingredients
- 200 grams (approximately 20) Oreo cookies
- 60 grams (1/4 cup) butter
- 200 grams (1 and 1/3 cup) good quality milk chocolate, broken into pieces
- 200 grams (1 and 1/3 cup) good quality dark chocolate, broken into pieces
- 600 ml (2 and 1/2 cups) thickened or heavy cream, plus extra for decorating
- Fresh raspberries, for decorating
Instructions
- Lightly grease a 9 inch springform baking tin with a little butter and set aside.
- Add Oreo cookies (cream filling and all) to a food processor and blend until they resemble fine crumbs. Melt butter in the microwave and pour over your crushed Oreos and whiz again the mixture resembles wet sand.
- Pour Oreo mixture into your prepared tin and press down gently to form an even layer. Pop in the fridge.
- Place chocolate in a large heatproof bowl and melt in the microwave, stirring every 30 seconds, until smooth and creamy. Leave for a few minutes to cool slightly.
- Meanwhile, use an electric mixer to beat cream until stiff peaks form*. Gently fold cream into melted chocolate until smooth and combined. Pour over cookie crust. Place in the refrigerate to set for at least 4-6 hours or even better, overnight.
- To serve, decorate with extra whipped cream and fresh raspberries. Serve cold.
Notes
*To check if your cream is whipped – you should be able to tip the bowl upside down with any cream moving.


Hi, I’m Jess, the creator of Sweetest Menu and the author of Something Sweet. A self-taught baker and published recipe writer who can’t stop making easy and delicious baking recipes.

Bianca says
This has become the traditional celebration cake in our house – we have experimented with the base over the years but no other recipe comes close to the delicious creaminess of this mousse
Jessica Holmes says
How wonderful! Love that Bianca!
Cyra says
Hi I have made this cake many times and love it. I made it today but our party got postponed. Can I freeze this cake and for how long
Jessica Holmes says
Hi Cyra, I actually haven’t tried freezing this one so I’m not sure. Cream doesn’t always freeze that well. If you did freeze it, can you let us know how it went?
Cyra says
Yes I did end up freezing it . I covered it in cling plus foil properly an dfroze it for a week. On the day of I put it in the fridge in the morning then ate it in the evening. It turned it good . I have also made it before without freezing it and both were very similar
Jessica Holmes says
Ohh that’s so wonderful to hear Cyra! I’m so pleased it froze well for you!
Stacey says
I’m going to use Ghirardelli milk and dark chocolate. I bought heavy whipping cream. I see from the recipe that you do not sweeten the whipped cream….is this correct?
Jessica Holmes says
Hi Stacey, I’m excited you are going to try this one. Yes that’s right! I find it’s plenty sweet enough with the chocolate.
Judith says
I took a picture so can send you. It’s not as high as your cake. Why??
I did everything as per the recipe.
My family doesn’t like raspberries so just used whipped decoration.
Jessica Holmes says
Hi Judith, you can always send me an email at jessica@sweetestmenu.com. Did you use a different size pan? That would effect the height.
Grace Lyon says
I made this cake for my daughter’s bday, everyone loved it! Super easy but a tad messy. I used peppermint joe Joe’s from TJs for a holiday flavor. Thank you so much!
Jessica Holmes says
I’m so happy to hear that Grace! Thank you for your lovely feedback.
Marsha says
Can I use Kool whip instead of whipping the cream?
Jessica Holmes says
Yes!