
Learn how to make fluffy Sponge Cake from scratch. This easy genoise sponge is perfect for filling with jam and cream. Plus, I’m sharing all my troubleshooting tips to ensure your Sponge Cake turns out perfect every time.
Meet the fluffiest Sponge Cake ever ❤️
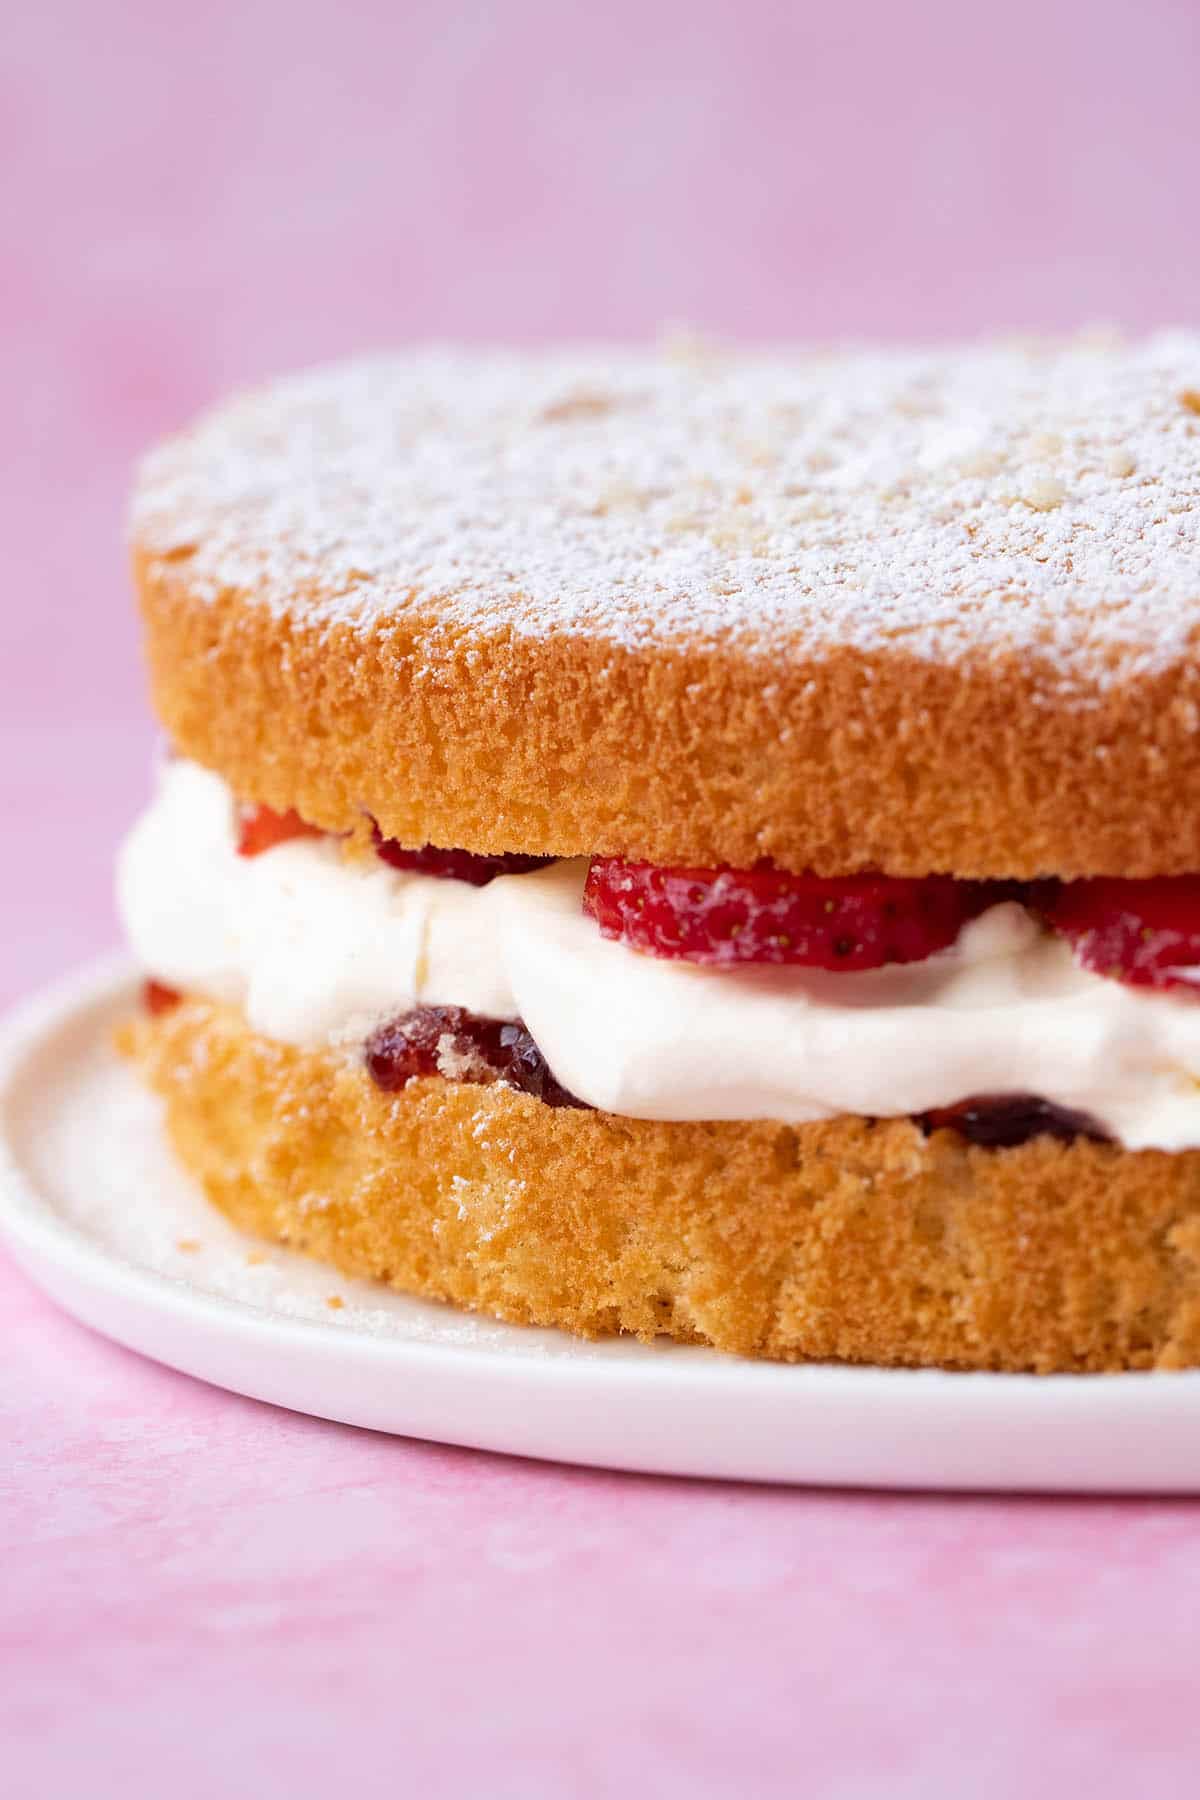
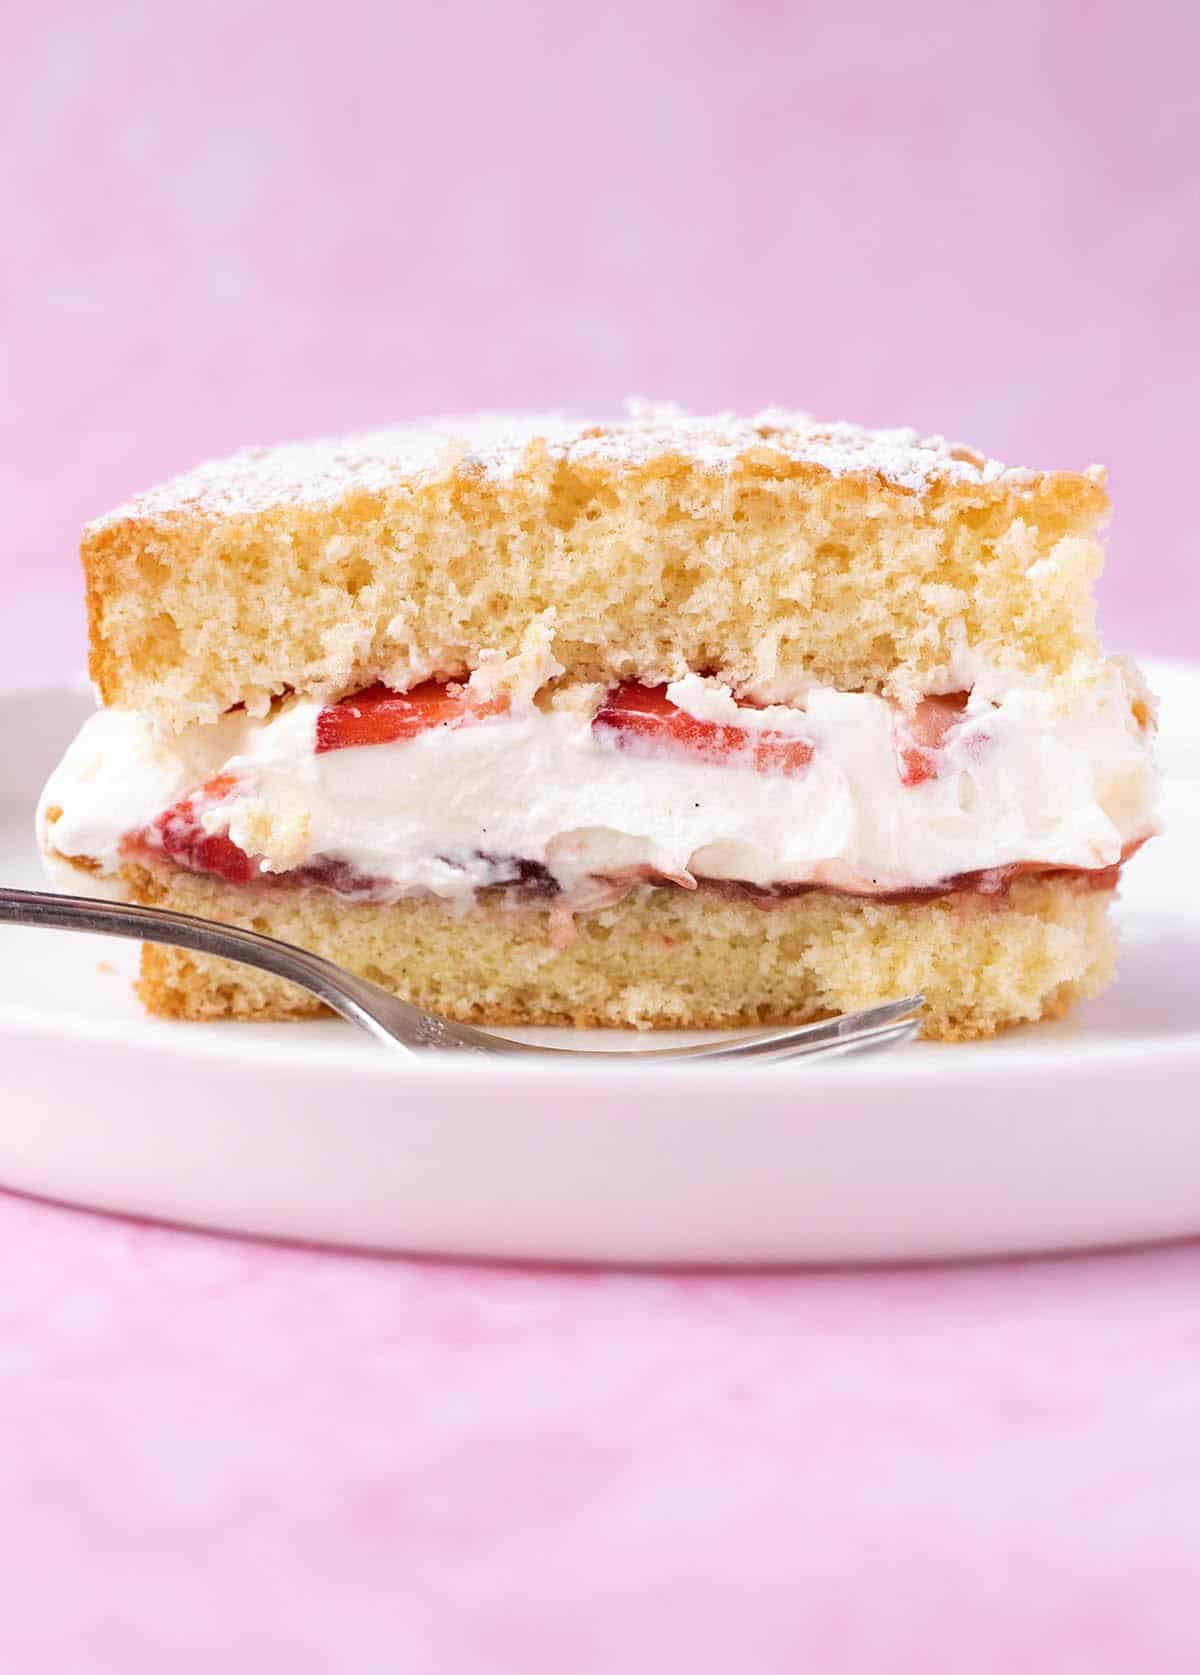
This simple, genoise sponge is incredibly soft and light, but it’s not dry or bland. It has a beautiful, open crumb and a lovely flavour from a little bit of butter and fresh lemon zest.
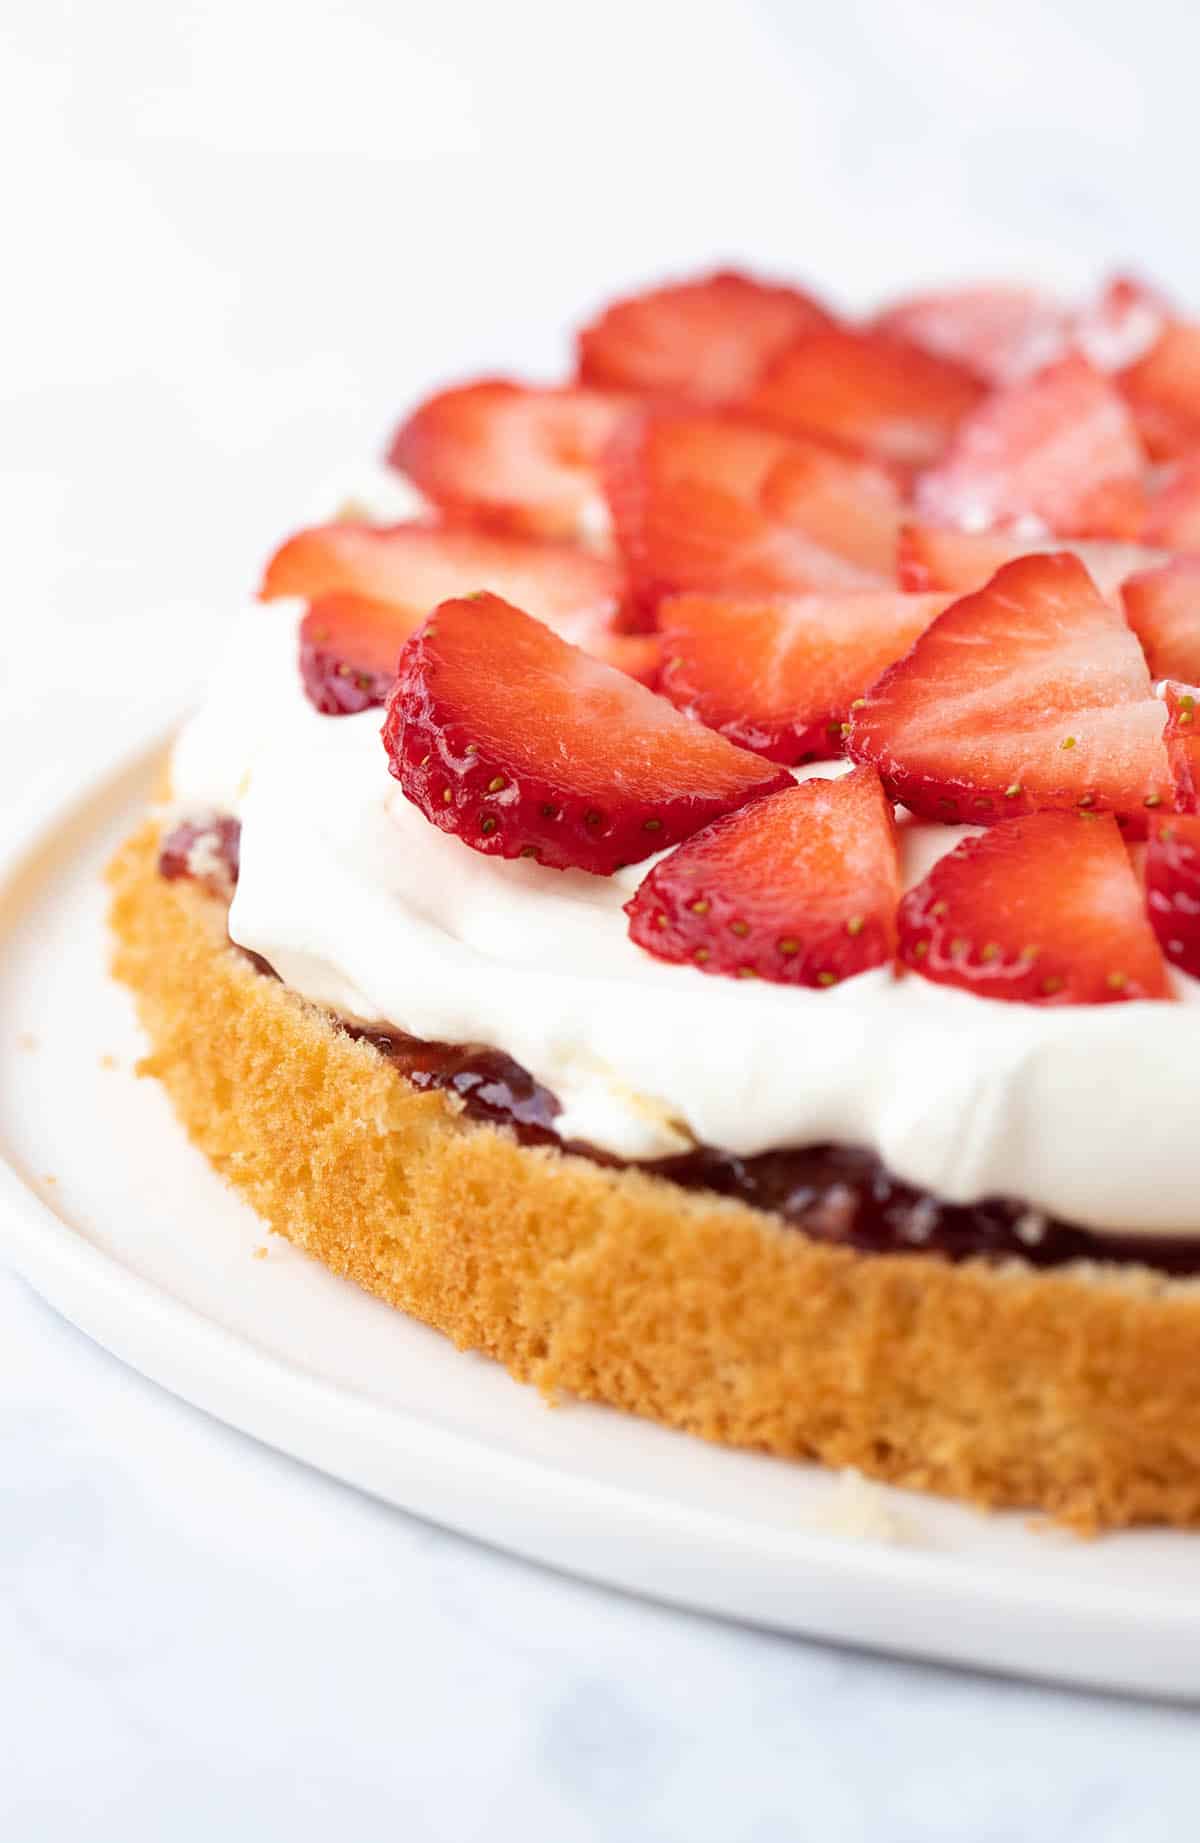
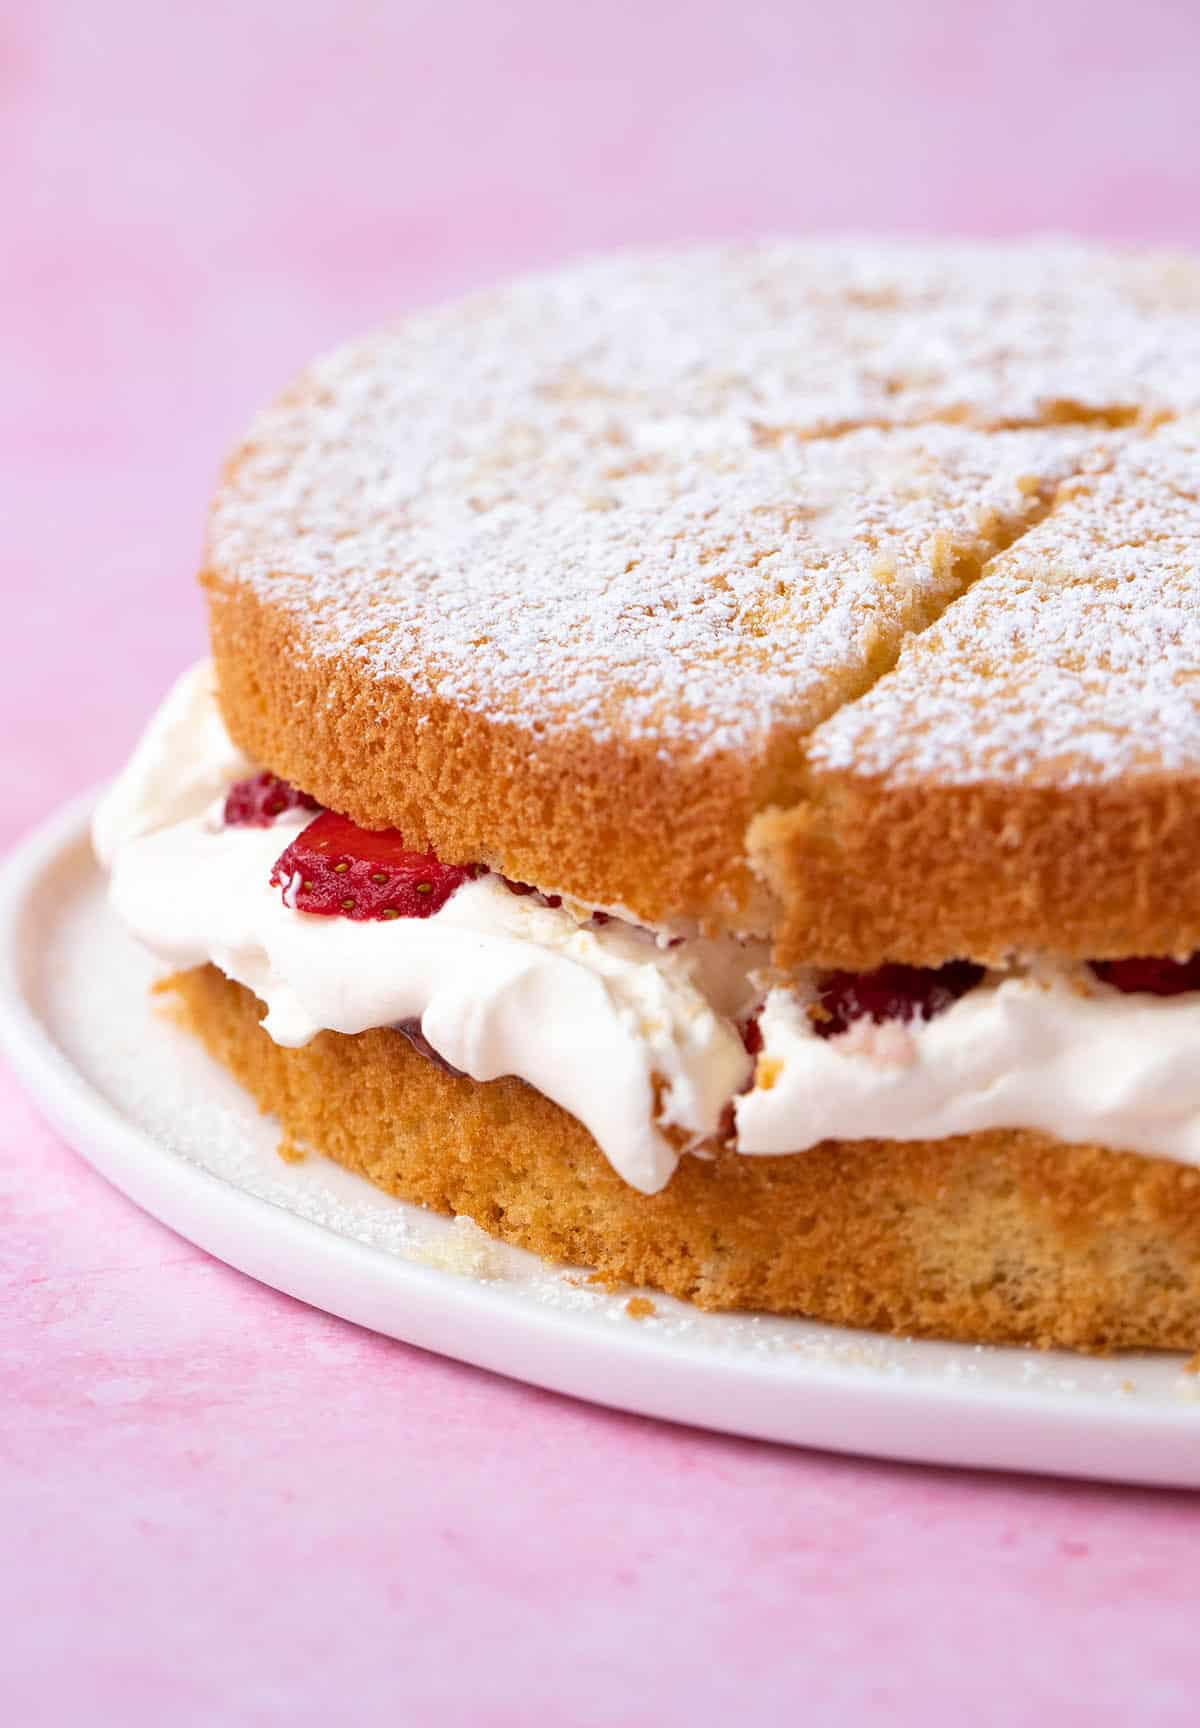
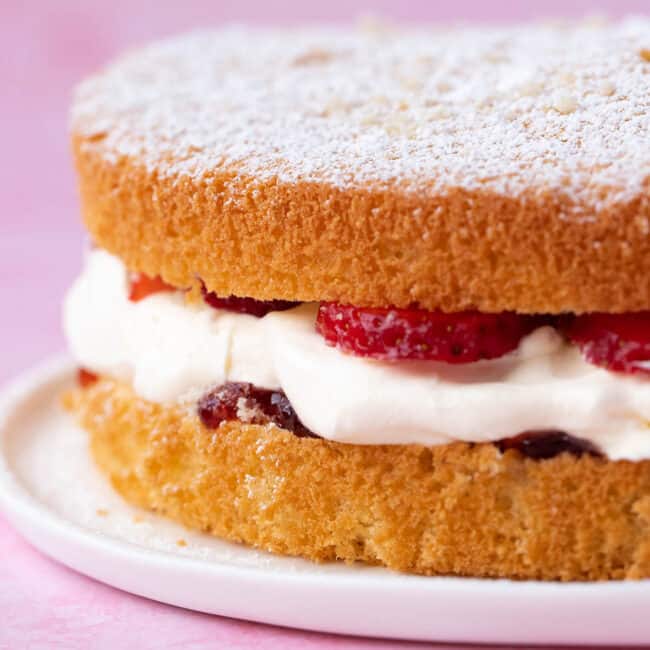
Today, I’m showing you how to make it, including all my tips and tricks for the perfect sponge every time. You can fill this cake with anything, but I love serving it with whipped cream, sweet strawberry jam and fresh strawberries.
why you will love this recipe
- Tender texture: You can expect an incredibly light and tender sponge.
- Beautiful flavour: This cake tastes even better than the storebought kind.
- Simple ingredients: You only need a handful of everyday ingredients.
- A little fancy: This Sponge Cake is perfect for celebrations and special occasions.
I have this twice now and it is amazing! So impressed with how it rose perfectly flat (no sinking in the middle), all your instructions are super helpful. This will be my go-to recipe now!
– Robin
Recipe testing
Growing up, Sponge Cake with jam and cream was a family favourite – always storebought mind you. And it is still my dad’s favourite cake, and my husband’s too.
So I have long wanted to master a genoise from scratch. Plus, you can’t watch one episode of The Great British Bake Off without hearing the word ‘genoise’ half a dozen times 😂
But while I’ve always felt intimated by Sponge Cakes, I’ve finally learnt how to make one – a really, really good one – and I’m excited to share everything I know!
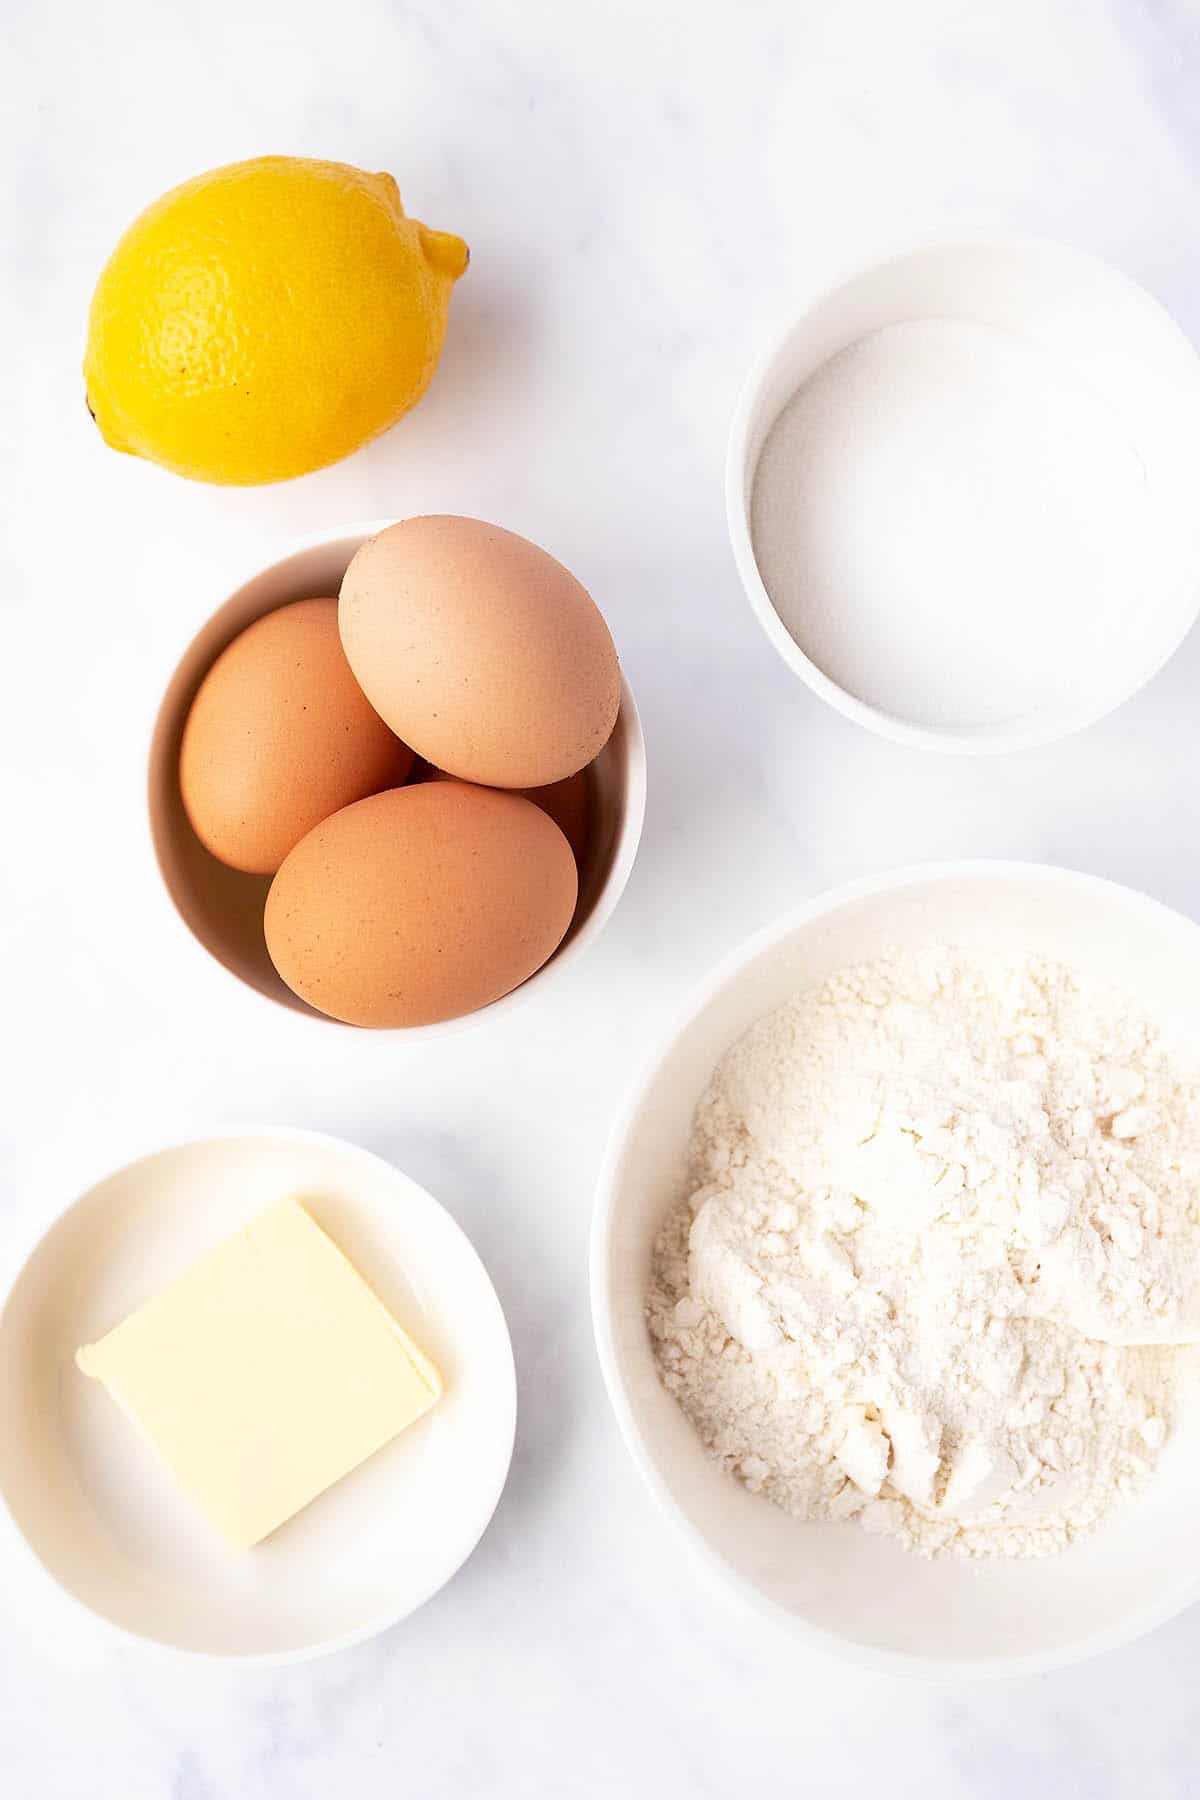
Genoise sponge is made from four simple ingredients: eggs, sugar, flour and butter. But it’s less about the ingredients and more about the technique that will give you success.
Unlike a Butter Cake or Vanilla Cake, a genoise sponge has no chemical leaveners like baking powder or baking soda. Instead, it gets its airy texture from whisking the eggs until they’re light and fluffy, just like my Swiss Roll Cake. We use a similar technique in my Chocolate Cake Roll recipe.
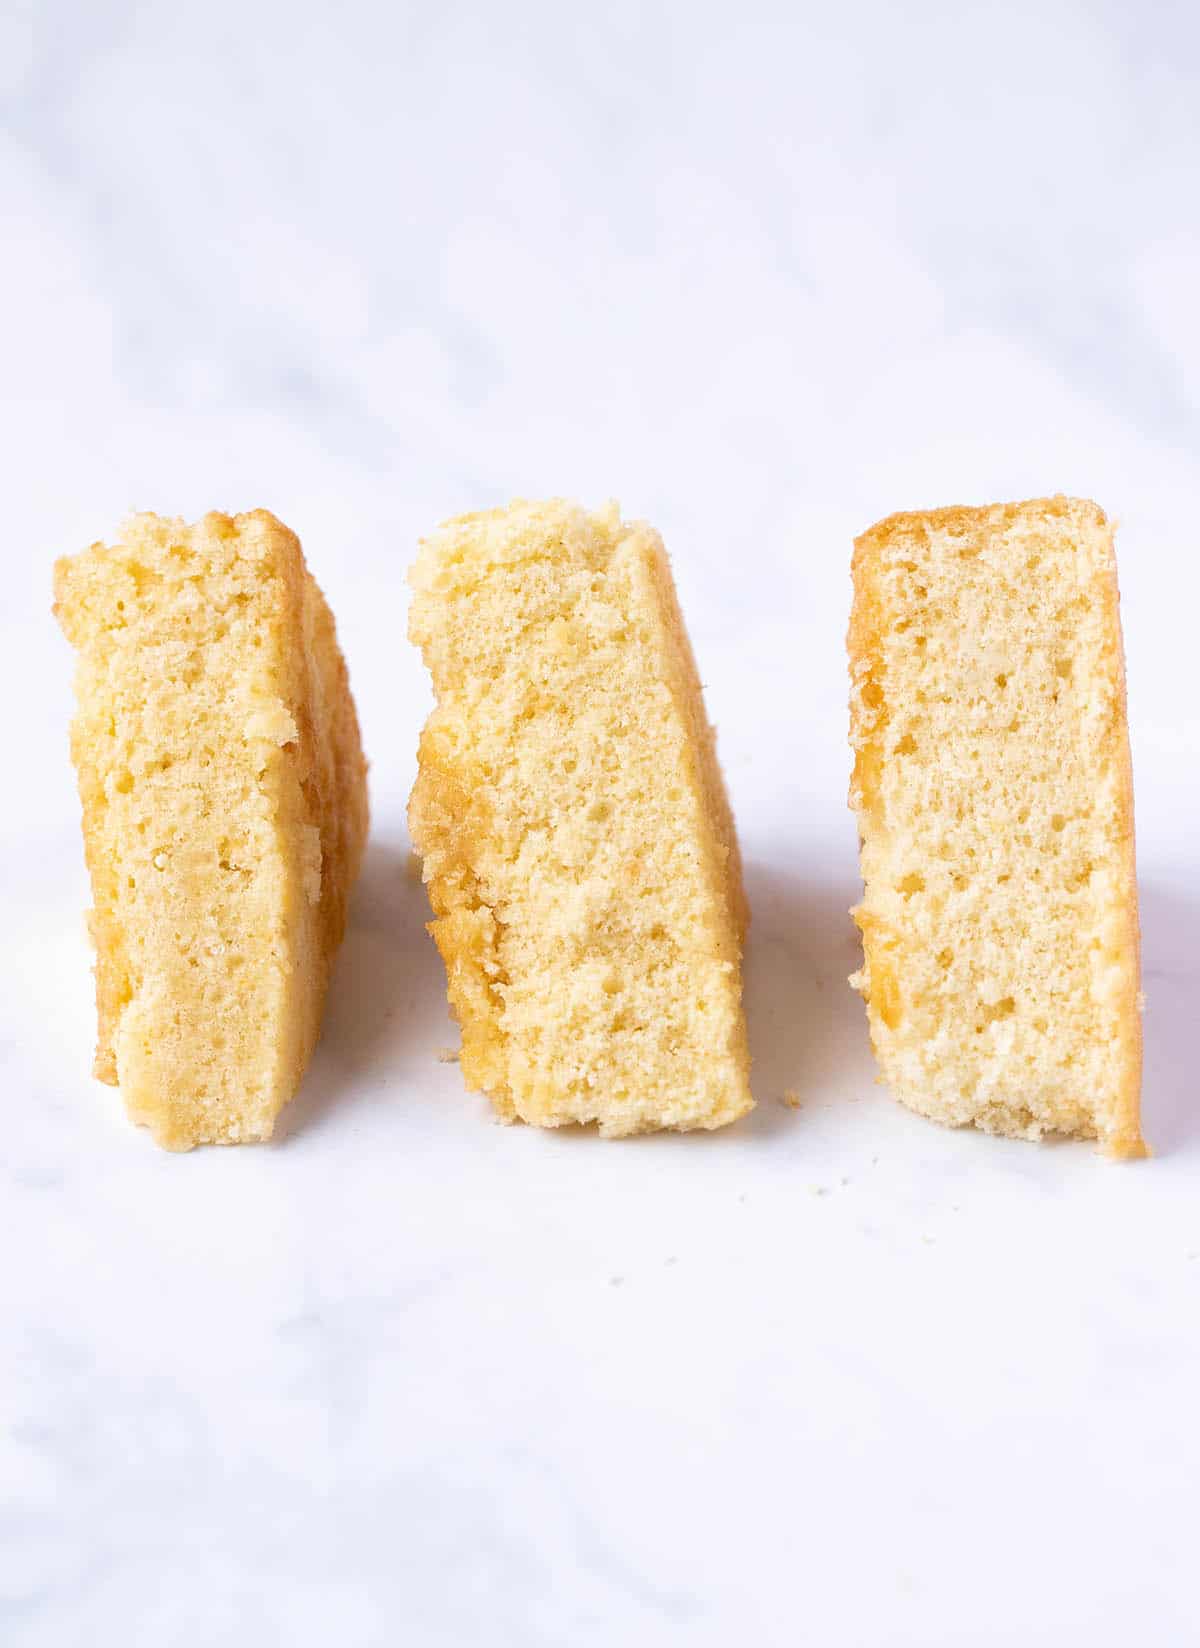
My first attempt at a sponge was basically inedible. I was so scared of knocking the air out of my eggs, that I didn’t mix it properly, so it was full of flour pockets and clumps of butter.
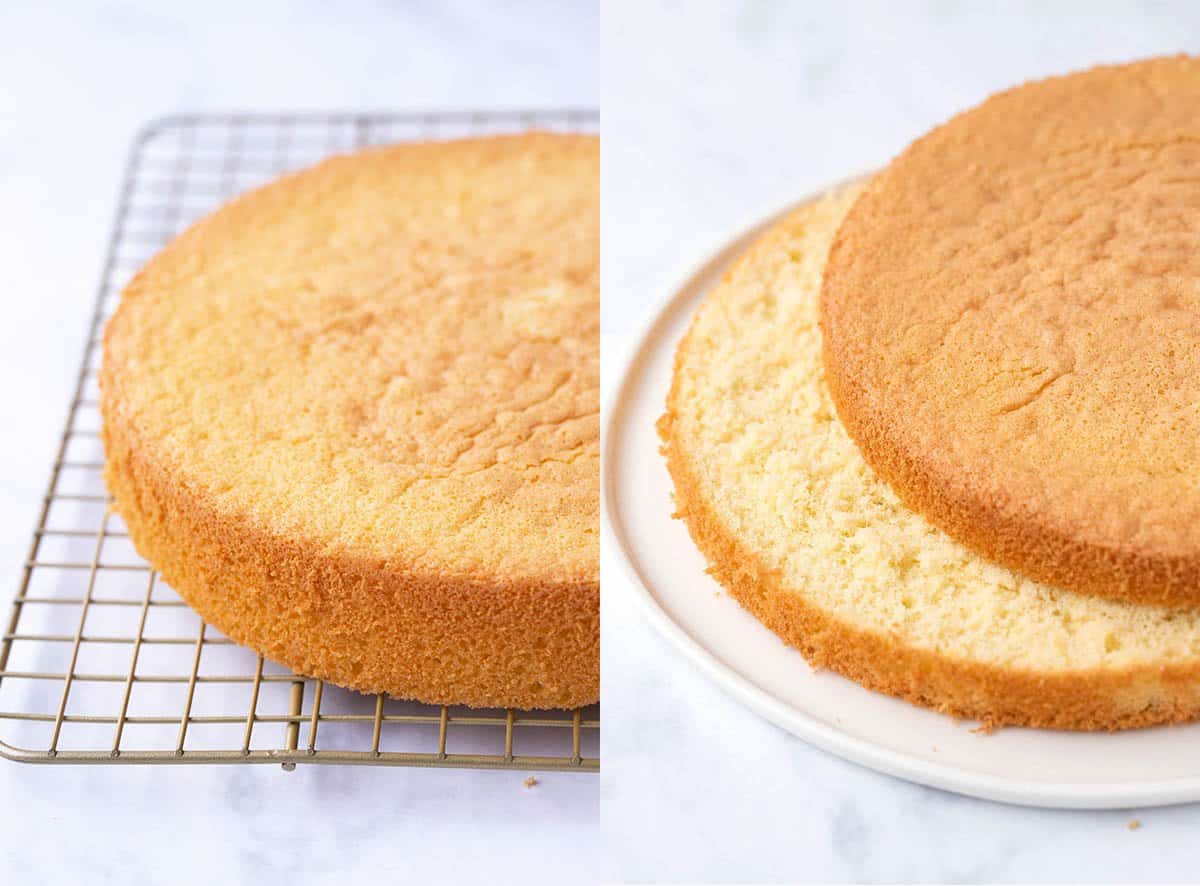
The second time, I didn’t change any of the ingredients, I just worked on my mixing technique. The difference between the two cakes was remarkable (first and second cakes pictured above). This sponge had great height and a great texture.
However, I just wanted it to be a fraction lighter, so for test 3, I slightly reduced the flour and increased the sugar. The result was perfection.
This cake is beautifully golden with a light, open crumb and a sweet, buttery flavour.
Ingredients
This Sponge Cake only requires five, everyday ingredients. You don’t need any chemical leaveners, but instead the cake gets its rise from the eggs. More on that below.
- Eggs: Make sure your eggs are fresh and at room temperature.
- Caster sugar: Caster sugar is perfect for this recipe because it’s fine and dissolves easily. If you don’t have access to caster sugar, you can use granulated sugar – just make sure you add the sugar gradually so it has time to dissolve.
- Plain flour: Or all purpose flour.
- Butter: Not all sponge recipes include butter, but just a small amount ensures your sponge will be soft, moist and flavourful.
- Lemon zest: A little fresh lemon zest adds a light and fresh flavour to the sponge. It can also help prevent a sponge that tastes ‘eggy’.
You can fill your sponge with anything – jams, curds, cream, spreads, fruit. I usually fill mine with strawberry jam, whipped cream and fresh strawberries.
what special equipment will I need?
- Baking scale
- Zester or fine grater
- Stand mixer or handheld electric mixer
- Sieve
- Large metal spoon
- 8-inch round cake pan
save this recipe
how to make genoise sponge
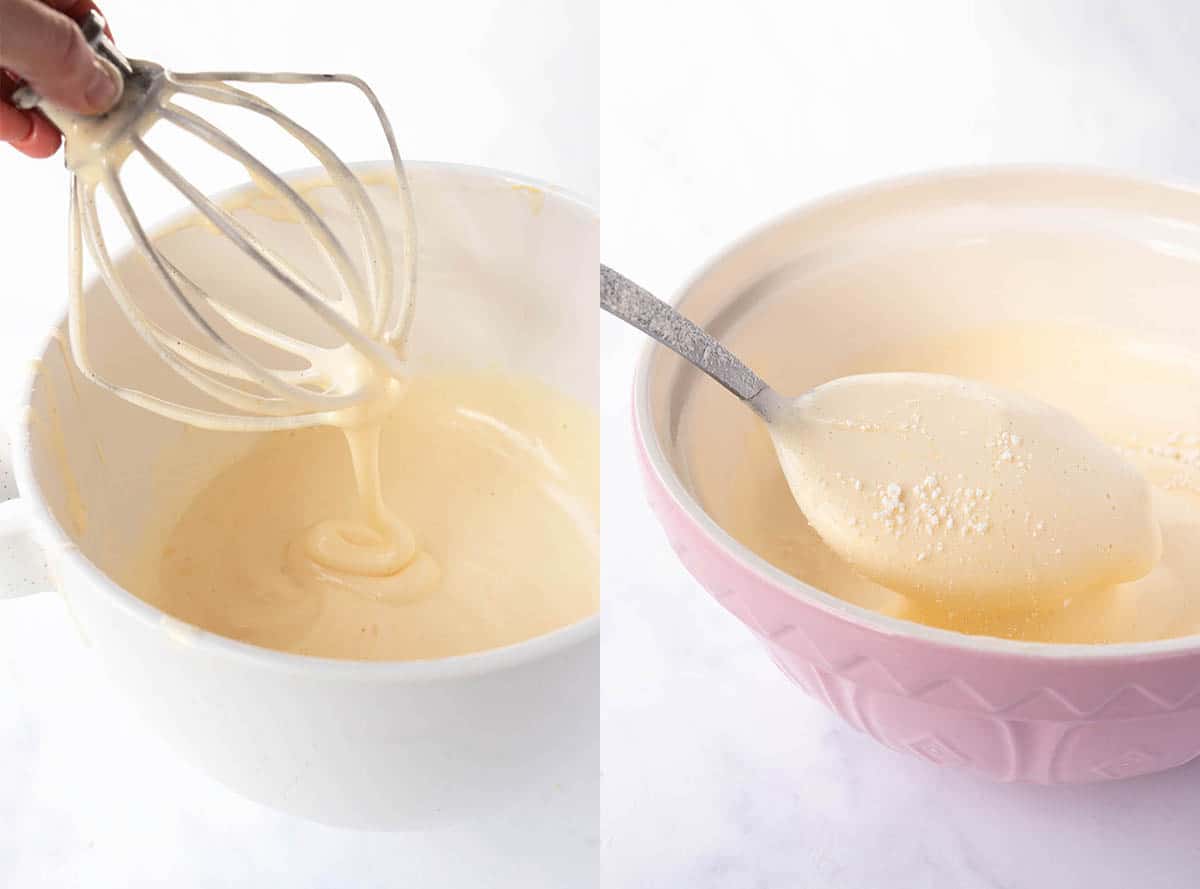
- The first step is beating the eggs and sugar until they are pale and fluffy and have tripled in volume – commonly referred to as ‘ribbon stage’. This can take at least 5-7 minutes. You’ll know the eggs are ready when they fall in a zig-zag pattern from the whisk.
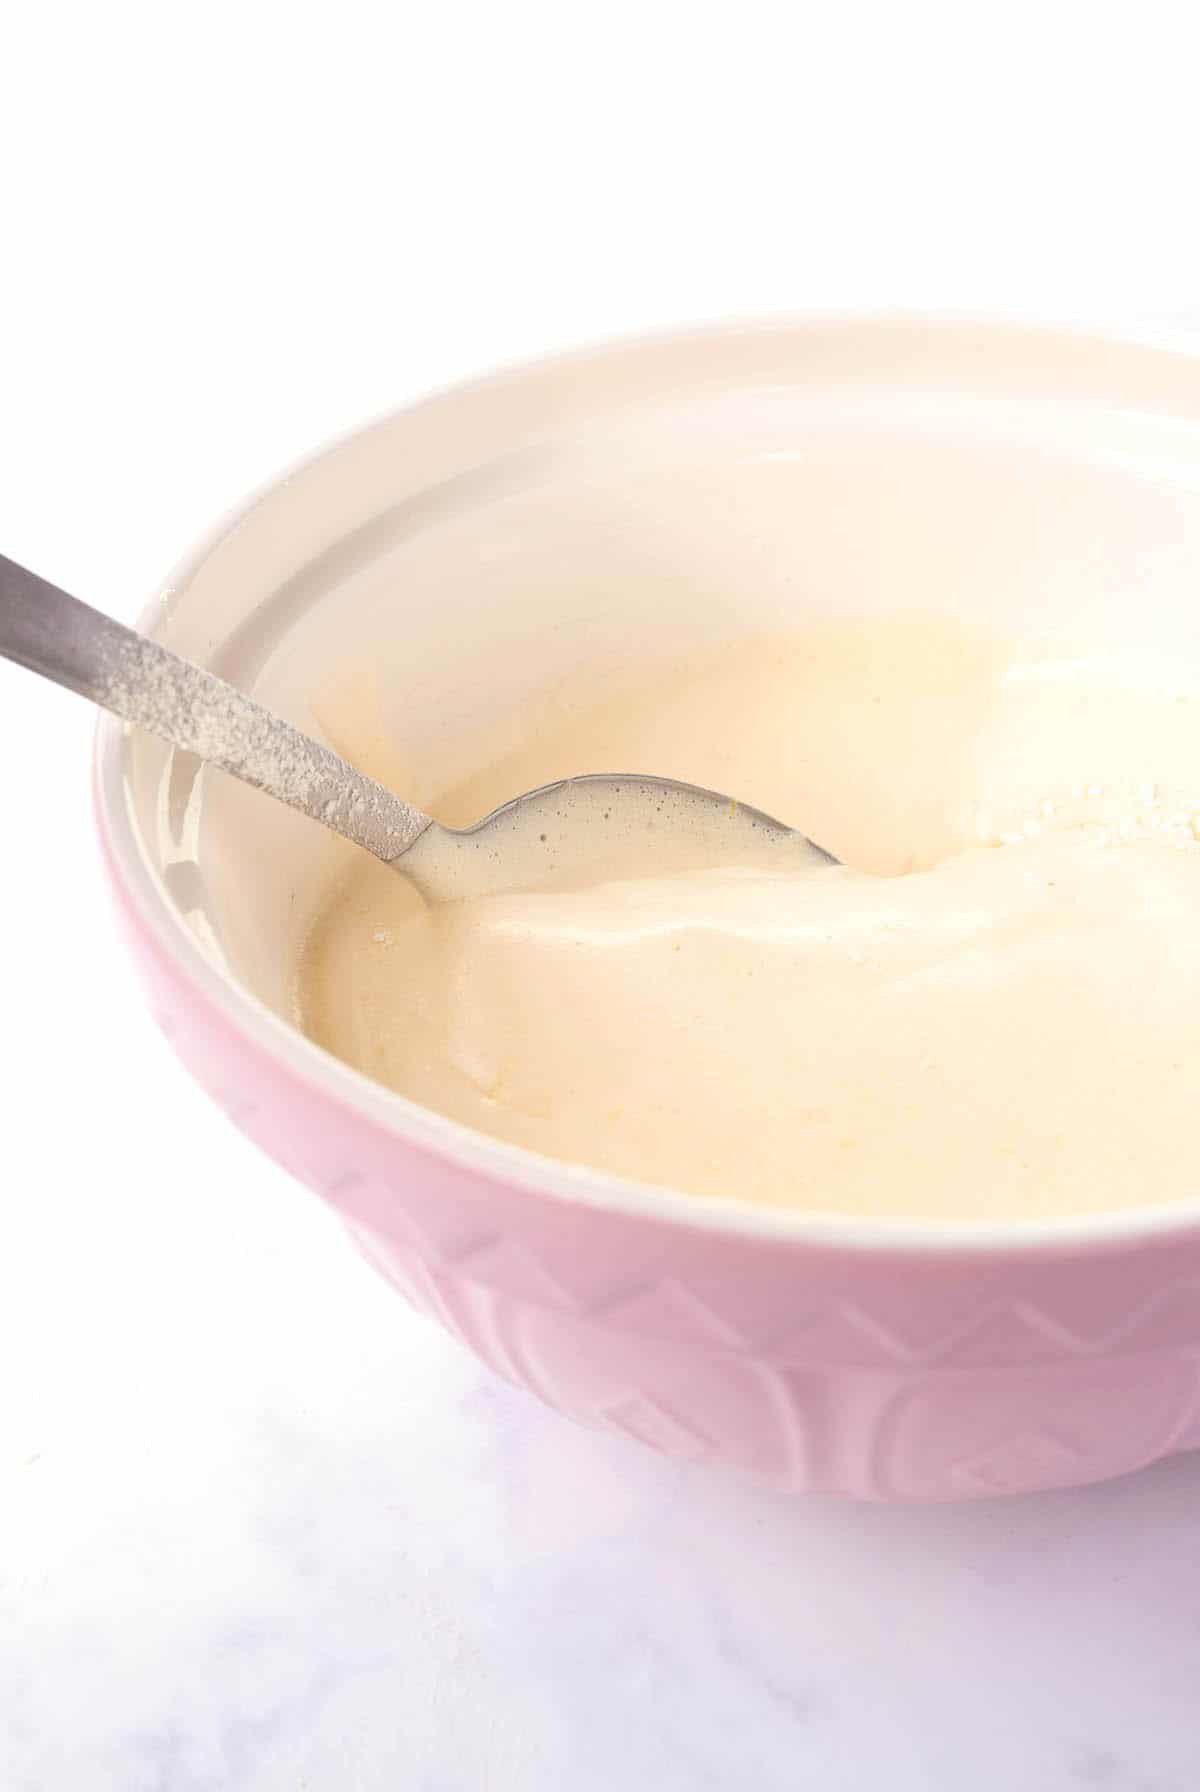
- Next, you’ll have to gently fold in the flour. It’s very important not to over-mix your cake batter, so use a light hand when mixing. You do need to ensure all the flour is fully incorporated – but don’t mix any more than you need to. Be sure to sift the flour three times (yes three!) and add it to the batter in two stages.
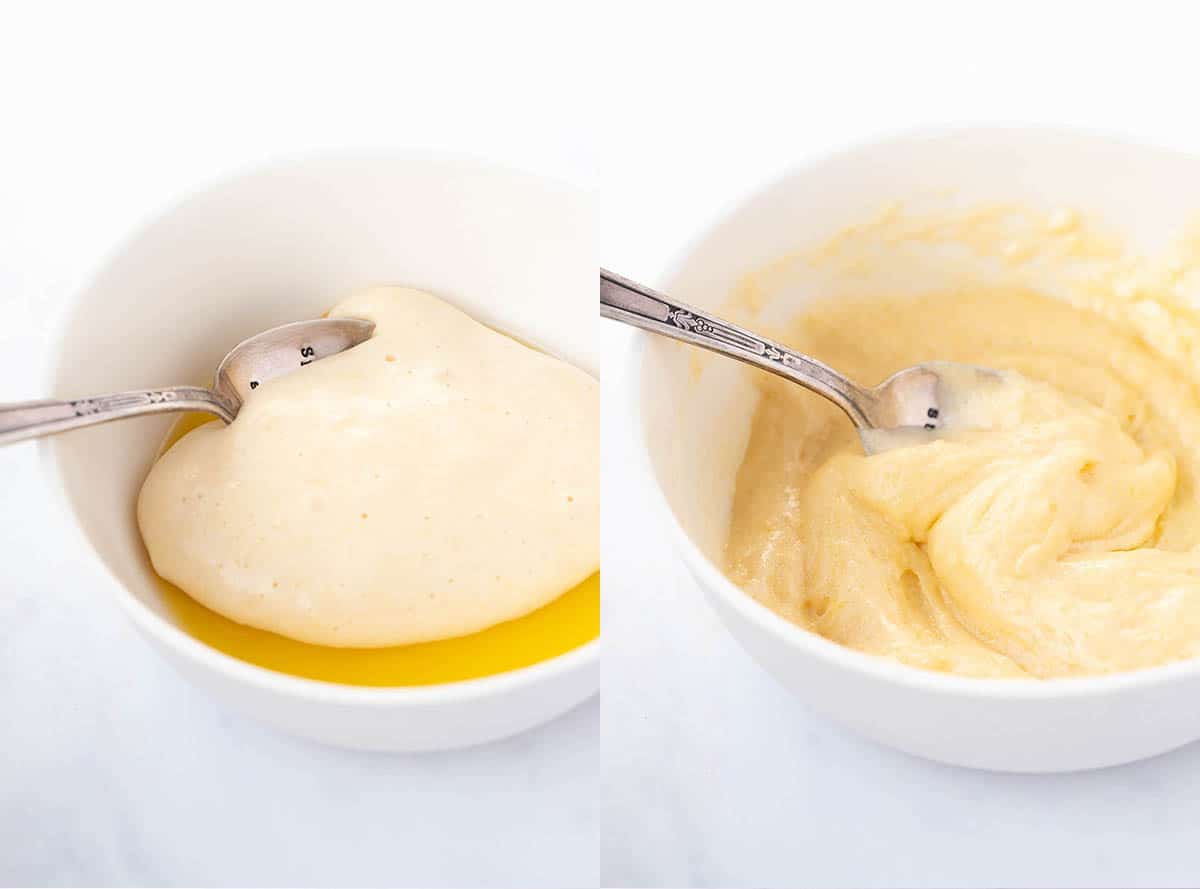
- The final ingredient is melted butter. A spoonful of cake batter is mixed into the melted butter, then it’s all added back into the batter and gently folded through. The cake batter is then ready to be baked.
Tips for a successful sponge cake every time
- Don’t grease your cake pan: This cake needs to stick and essentially climb up the sides of the cake pan in order to rise properly. But don’t forget to line the bottom with baking or parchment paper.
- Weigh your ingredients: I recommend using a baking scale to weigh your flour, sugar and butter for best results.
- Use fresh, room temperature eggs: Room temperature eggs will whip up more easily than fridge-cold eggs, and achieve greater volume. Remember to get them out of the fridge the night before baking.
- Double check your eggs are at ribbon stage: Eggs are the foundation of a good sponge. Whipping them to ribbon stage is a must in order for your cake to rise. The eggs should be pale and fluffy, and fall in ribbons when you lift the whisk. You can double check they’re ready by using the whisk to draw a figure 8 on top of the batter. If the 8 is complete and hasn’t sunk by the time you finish drawing, you’ll know your eggs are ready.
- Sift your flour three times: I know sometimes you can get away with not sifting your flour, but this is not one of those times. Sifting the flour not once, not twice, but three times is an absolute must.
- Use a large metal spoon to mix: The key to not over-mixing your batter when adding the flour is to gently fold the mixture by hand. Using a large metal spoon helps mix the flour in quickly and easily while preventing over-mixing.
- Sacrifice batter for butter: It can be hard to fully incorporate the butter if you drizzle it straight into the cake batter, as it can sink to the bottom. It is much easier to take a large spoonful of batter and mix it into the melted butter first, and then gently fold it all back into the batter.
- Bake until golden: Watch your bake time carefully. Under-bake your sponge and it may sink in the middle, while over-baking will result in a dry sponge. Once your cake is golden all over and it springs back lightly to the touch, it is ready.
troubleshooting sponge cakes
If your cake is flat and rubbery, it is likely you mixed your batter too vigorously when adding the flour and/or butter. This causes all the air in the eggs to deflate, and the cake won’t rise correctly. It is also important to make sure your eggs are at ribbon stage before adding the flour. If you haven’t incorporated enough air into the eggs to begin with, your cake will also turn out flat. Also, do not grease the sides of your cake pan – this cake needs to grab onto the sides to rise.
You haven’t thoroughly mixed the flour into the cake batter. It’s easy for flour to get trapped at the bottom of your mixing bowl, so you need to be thorough when folding the cake batter. Using a wide, flat bottomed mixing bowl can help and also a large metal spoon. Make sure you sift your flour three times, and add it gradually into the batter – in two or three increments.
Your cake is underbaked. It might look ready but if it wasn’t fully baked, it’ll sink as it cools. Try baking it for a few more minutes next time.
Sponge cake will be dry if it’s overbaked. Try baking it for a few minutes less next time. Also, consider getting an oven thermometer to double-check that your oven isn’t running hot. Be sure to measure your ingredients using a baking scale, so you don’t add more flour than needed – this will also result in a dry cake.
more classic cakes
Did you make this recipe? Don’t forget to rate the recipe and leave a comment below. Hungry for more? Join me on Instagram, Facebook, Pinterest and Twitter for more amazing recipe ideas.
Let’s Bake
Sponge Cake
Light and fluffy sponge cake, also known as a genoise sponge, filled with cream and jam.
Ingredients
Sponge cake
- 105 grams (3/4 cup) plain flour or all purpose flour
- 4 large eggs, room temperature
- Zest of 1/2 lemon, finely grated, optional
- 120 grams (1/2 cup and 1 tablespoon) caster sugar
- 30 grams (2 tablespoons) butter
Cream filling
- 135 grams (1/2 cup) strawberry jam
- 300 ml (1 and 1/4 cups) and thickened cream or heavy cream
- 1/2 teaspoon vanilla bean paste or vanilla extract
- 125 grams (1 cup) fresh strawberries, thinly sliced
- Icing sugar or powdered sugar, to serve
Instructions
- Preheat oven to 170 C (340 F) standard / 150 C (300 F) fan-forced. Line the bottom of an 8-inch round cake pan with baking or parchment paper. Do not grease the bottom or sides with butter or oil.
- Preparation
In a medium-sized mixing bowl, sift flour twice. - Sponge cake
Place eggs and lemon zest in the bowl of a stand mixer fitted with a whisk attachment or in a large mixing bowl. Beat eggs for 1-2 minutes using an electric mixer on medium speed. Once eggs start to become thick and foamy, add the sugar, 1 tablespoon at a time, while continuing to mix. - Turn the mixer up to medium-high speed and continue to beat until eggs become pale and fluffy, and triple in volume. This will take around 5-7 minutes. Meanwhile, heat your butter in the microwave until melted and smooth, then set aside to cool slightly.
- You’ll know your eggs have reached ribbon stage when you can use the whisk to draw a figure 8 on top of the batter. If the number 8 is still there when you have finished drawing, your eggs are ready. (See photo below).
- Very gently transfer your egg mixture to a wide mixing bowl with a flat bottom. Sift half of your flour (yes a third sift), and then use a large metal spoon to gently fold it into your batter. Be careful not to knock the air out of your eggs, or your sponge will be flat and tough. Gently fold the batter, in an up and over motion.
- Sift over remaining flour, and continue to fold, ensuring there are no visible pockets of flour.
- Take a spoonful of batter and add it to your melted butter – ensuring your butter is still melted and smooth but not hot. Stir until batter and butter have combined. Then add the mixture back into your cake batter.
- Gently fold to combine, still being careful not to over-mix your batter. Gently transfer batter to prepared pans. Bake for approximately 28 minutes or until cake is golden on top and springs back gently to the touch.
- Leave to cool for 10 minutes. Then carefully run a butter knife around the edge of the cake and gently remove cake from pan. Transfer to a wire rack to cool completely.
- Cream filling
Add cream to a medium-sized mixing bowl. Beat using an electric mixer on medium speed until cream has thickened and reached soft peaks. Add vanilla and beat briefly. - Carefully slice cooled sponge cake in half using a serrated knife. Place the bottom layer on serving plate or cake stand. Generously cover the sponge in strawberry jam, going right to the edges.
- Dollop cream over the top of the jam and spread to the edges of the cake. Add sliced strawberries. Place remaining sponge cake on top.
- When you are ready to serve, dust the top of the cake with icing sugar.
Notes
Cake pan: Do not grease your cake pan with butter, oil or flour, and only line the bottom of the pan with baking or parchment paper. The cake needs to cling to the sides of the pan in order to rise correctly. Once baked, you can easily run a butter knife around the edge to release the cake.
Eggs: It’s important to use fresh, room temperature eggs. Our large eggs are between 50-55 grams each. Your eggs must reach ribbon stage in order for your cake to correctly rise. You can double check they’re ready by using the whisk to draw a figure 8 on top of the batter. If the 8 is complete and hasn’t sunk by the time you finish drawing, you’ll know your eggs are ready. See photo below.

Lemon zest: This is optional but it adds flavour to the cake. It can also help overcome the eggy flavour that sponge cakes can be prone to.
Caster sugar: Caster sugar is ideal for this recipe because it’s so fine and dissolves easily. If you don’t have access to caster sugar, you can use granulated sugar – just make sure you add the sugar gradually so it has time to dissolve.
Storage: This cake is best eaten on the day it’s made but it will keep for 1-2 days. I recommend storing it tightly wrapped in plastic wrap in an airtight container at room temperature. Once you add the whipped cream filling, you’ll need to store any leftovers in the fridge.
Nutrition Information
Serving Size: 1 slice Calories: 297 Sugar: 27.6 g Sodium: 47.1 mg Fat: 12.5 g Carbohydrates: 41.6 g Protein: 5.2 g Cholesterol: 122.6 mg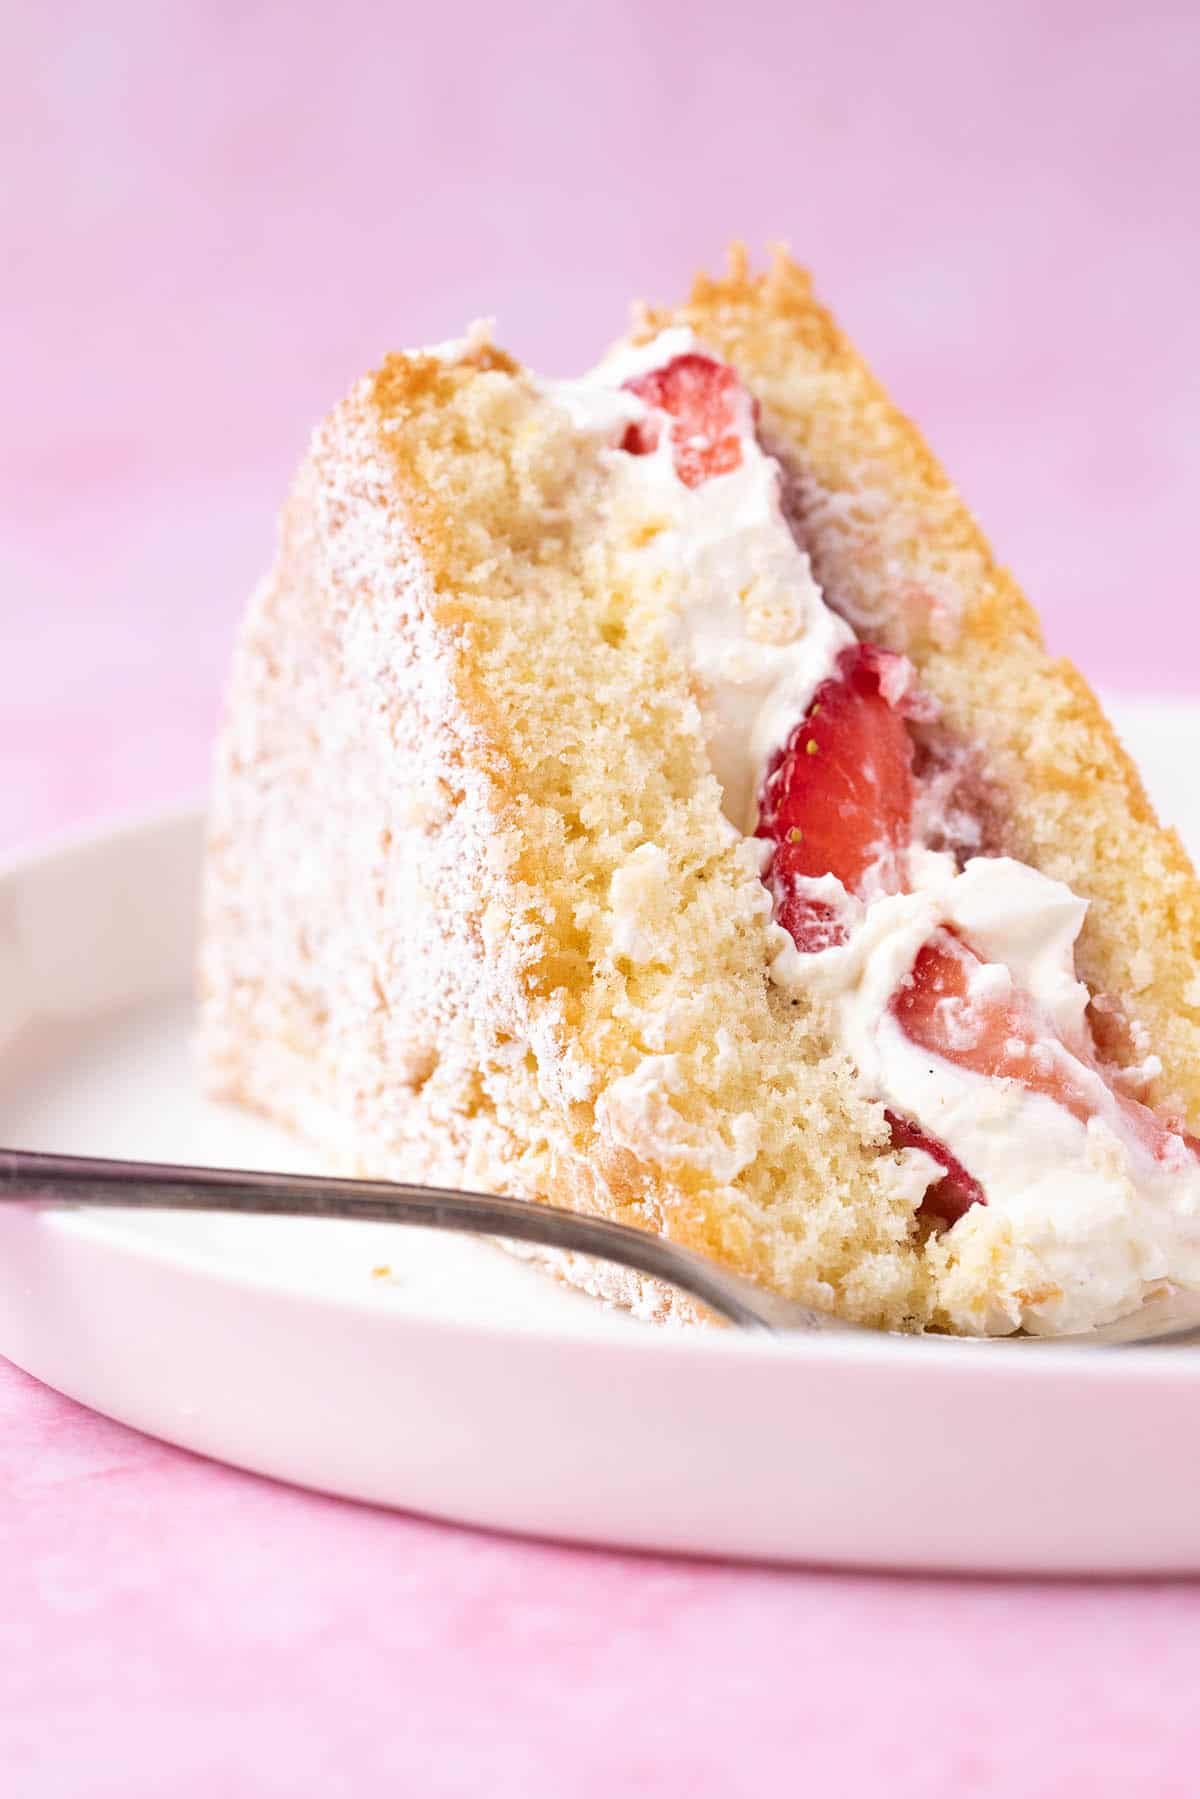


Hi, I’m Jess, the creator of Sweetest Menu and the author of Something Sweet. A self-taught baker and published recipe writer who can’t stop making easy and delicious baking recipes.

Henrietta says
Excellent recipe
This really works and is completely delicious
Thank you!
Jessica Holmes says
That’s so lovely to hear Henrietta!
eden says
Hi there!
I tried to make your cake, and the batter looked amazing while I was making it, but it smells very much like egg! What did I do wrong?
Jessica Holmes says
Hi Eden, sponge cakes can smell eggy because of the high ratio of egg to fat. If your eggs were fine, it should be ok once the cake cooks and cools.
Robin says
Hi Jess! Although I’ve made this before, I’ve forgotten what size eggs I used! Can you confirm the ones you use are 50-55g *including* shell? Is that size large in Australia (600g carton)?
Would be so great to see the total weight of egg required in a recipe like this that relies on eggs as the main ingredient 🙂
Jessica Holmes says
That’s correct Robin! And I appreciate that feedback! I’ll update the recipe notes.
Shaz says
Thank you for sharing this recipe! Looks fairly easy to make. I was wondering if I can reduce the sugar to at least 85-90g? My family don’t like overly sweet cakes. Also, could I use this recipe for 2 6inch round tins?
Jessica Holmes says
Hi Shaz, it’s really up to you. I felt the listed amount of sugar is perfect for this cake, remembering that sugar not only adds sweetness but moisture, colour and flavour. You can use 6-inch round pans but you may to watch the bake time as they batter will be deeper.
Robin says
I have this twice now (both times I made a half recipe in a 6″ tin) and it is amazing!! So impressed with how it rose perfectly flat (no sinking in the middle), all your instructions are super helpful 🙂 Plain sponge with jam and cream in the middle is my partners favourite, so this will be my go-to recipe now!
Jessica Holmes says
I love hearing that Robin! So glad the tips were helpful. Thank you for your lovely feedback.
Shamistha says
Is it better to beat the egg whites separately to stiff peaks and fold it in to make it lighter and fluffier?
Jessica Holmes says
Hi, I recommend following the recipe as written. The method outlined will create a lovely light and fluffy sponge.
Josh says
This cake was lovely and light!
Jessica Holmes says
So glad you enjoyed it Josh!
Joy says
Hi Jess!
I’ve tried quite a few of your recipes and they turn out perfectly every time and I can’t wait to try this one for this Jubilee weekend in the UK. I was wondering if I could use a 9 inch round pan as I don’t have a 8inch unfortunately ;(
Jessica Holmes says
Hi Joy, I’m so excited you are going to give this recipe a try! You can definitely alter the pan size but it will change the bake time. My concern with a 9 inch cake pan is that the cake will be thinner so you might have trouble slicing the cake in half for two layers.